Although Valve has added some great tools like the model viewer and the Hammer editor to their HL²-SDK, it still supports SOFTIMAGE|XSI only. However, there is a way to get your favourite models from HL² (including their sequences for animation and normal maps) into 3ds max. This tutorial shows you how...
Step 1: Required Programs & Plugins
• GCF Scape to extract the files used by Steam in the game cache files (.gcf)
• Jed's VTFTool to convert the .vtf texture files of the Source Engine to .tga files
• Canonfodder's MDL Decompiler to get the .smd references and animations out of the .mdl files
• Canonfodder's 3ds max Importer to import the .smd references to 3ds max
• (optional:Canonfodder's 3ds max Exporter to export custom models to .smd)
Once you have downloaded and installed all the programs it's time to begin.
Step 2: Extracting the model data First close Steam and then go to your X:\[Path_to_Steam]\Steam\SteamApps\-directory and double-click the file named source models.gcf. (If Steam is still running, you will get an error message, because the file we need is used during the runtime of steam.exe).
GCFScape will now show you the content of this game cache file. Inside, browse to hl2\models\ and scroll down in the right half of the window until you see some loose files ending with .mdl .
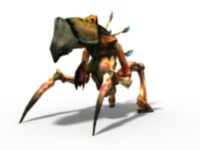
I choose to extract the AntLion_Guard model here to demonstrate the futher steps in this tutorial - of course you can choose any model you like, but I recommend to make the same choice if you are doing this tutorial for the first time. Now select all files named antlion_guard, right-click the selection and choose Extract... It is very important to extract all the antlion_guard.* files, because they contain information that is crucial for the next step.
Step 3: Decompiling the model
Launch Canonfodder's MDL Decompiler and click the upper button labeled "..." and select your antlion_guard.mdl file. Click the lower button to choose an output directory (usually same as input) and click Extract. Confirm the following message which pops up and tells you that the model was successfully loaded. Some HL²-models contain delta animations and you will get this message . Nothing wrong with that, just choose an animation sequence (with more than 1 Frame) from the list and double-click it to proceed. When the final message Completed dumping model appears, everything went right.
Step 4: Extracting the texture data
Now that we have our model we still need its textures.
Open the file source materials.gcf and browse to hl2\materials\Models\AntLion_Guard . Extract all files from this directory. I recommend to create a new subfolder in your target directory (e.g. "textures") for the texture files because a lot of files will be created in the target directory when decompiling the model .
Step 5: Converting the textures
Run Jed's VTFTool to convert the .vtf files to .tga. Choose File -> Convert to TGA -> Folder... and select the directory where your *.vtf files are located. ClickGo! and after a few seconds you will get the desired TGAs. You might note the bluish TGAs that resemble the base textures - these are so called 'normal maps'. Their impact on a 3D model is demonstrated later.
Step 6: Importing the model to 3ds max
Now that all the dry work is done, time to launch 3ds max and have some fun :)
If you installed Cannonfodder's 3ds max Importerplugin correctly you should now have a new filetype called .smd available in your File -> Import... Menu . Now select the Antlion_guard_reference.smd among the files for import. Always choose the *_reference.smd file first, because it contains all the information on the triangles and the skeleton of a model. The animations of a model are stored in the other .smd files and only contain information on the location of the bones during an animation, thus resulting in a much smaller file size.
A small window from Cannonfodder's importer pops up. Uncheck the option Prompt for missing textures and click OK.
Step 7: (Re-)Assigning textures to the model
So far so good, the model is inside of 3ds max, but after hitting [F9] (Quickrender) you will get a grey model. Don't worry the textures are not gone, 3ds max just can't find them. But why?
Concering textures, a .mdl files only contains information on the names and UVW coordinates of texture maps but it lacks of specific path information (not needed by Half-Life because the game engine manages allocating and applying textures during runtime). We will fix that issue in the following steps.
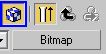
Hit [M] to open the Material Editor and click this button --> . Your mouse-pointer now has the shape of a pipet. Move it over your model and left-click. The Material Editor should now display a Multi/Sub-Material consisting of 2 sub-materials . Using this method on imported models that contain for example 6 different texture maps, 3dsmax will automatically generate a Multi/Sub-Material with 6 submaps for it.
Click the first button labeled with legsside.tga to access the first sub-material.
A bunch of new rollouts with parameters will appear. <-- Click the small button labeled with "M".
Once again a new rollout appears with the parameters of your bitmap. Click on the button labeled legsside.tga and point 3ds max to the folder where the converted .tga files are located.
Now go back to the top of the hierarchy of the Multi/Sub-Material and repeat the last step to re-assign the ssecond texture to the model.
To check if you have done everything right, hit [F9] or just click the small cube for a preview in the Perspective Viewport - now the model should be completely textured.
Step 8: Assigning 'normal maps' to the model
Remember the bluish .tgas files that were produced during the conversion of the .vtf files?
Now we take care of the 'normal maps' and restore their proper function. They are used to fake a slight displacement mapping on a model. This is archieved by alternating the angle of rays of light that hit the surface of the model. With this method you can simulate immersions for example, without increasing the number of polygons of a model.
The following example demonstrates the imapact of 'normal maps':
In the top level of the hierarchy of the Multi/Sub-Material click the first material labeled legsside.tga like you did in the step before. Scroll down a little to the Maps rollout, where a list of slots is located. Here you should see that the diffuse slot already has a map (which you assigned to it in the previous step). Check the box left to the Bump slot to active it and change the value from 30 to 100 .
Then click the button on the right labeled with "None" which will open the Material/Map Browser. Select Normal Bump from the list and click OK. The parameter rollout now shows 2 buttons with slots for Normal and Additional Bump.
Click the first button labeled "None" and the Material/Map Browser shows up again. This time select Bitmap and point 3ds max to the file named legsside_normal.tga.
Click OK and go up a level, back to the parameter rollout for the Normal Map. Now drag the material from the first button by holding down your left mouse button down and release it over the Additonal Bump button . Choose the option "Instance" in the following window . With this drag&drop method the material is copied to the second slot and changes made to the map will automatically apply to both slots in the future.
Congratulations, you are finished with the first material! Now go back to the Multi/Sub-Material Rollout and apply the last steps to the second material in the same way.
To test if you have assigned all your Normal Maps correctly, uncheck the option "Diffuse Map" in both materials and hit [F9]. 3ds max will now render the model without textures and show the effect of the remaining normal maps all over the model (result should be quite similiar to Fig.2).
Conclusion
Now you are able to import your favourite models from HL² to 3ds max and play around or assign animations to them.
As you can see the most time-consuming part is the reassignement of all the textures and their appropriate normal maps but you are getting rewarded with a nice result... :)

 Then click the button on the right labeled with "